The Art
Stanley Ginsberg and Norman Berg’s cookbook, Inside the Jewish Bakery, brings back wonderful memories of growing up in North Toronto in the ’60s and ’70s, when Jewish bakeries dotted every city block.
Every page of this fabulous cookbook pays tribute to the Eastern European recipes and traditions Jews brought with them to America.
My favourite chapter is the one on challah, of course! Because my family loves sweet challah, I chose to test the Sweet and Rich Challah first. True to its name, it’s sweet, extremely sweet. Okay, maybe too sweet. But I will get into that later.
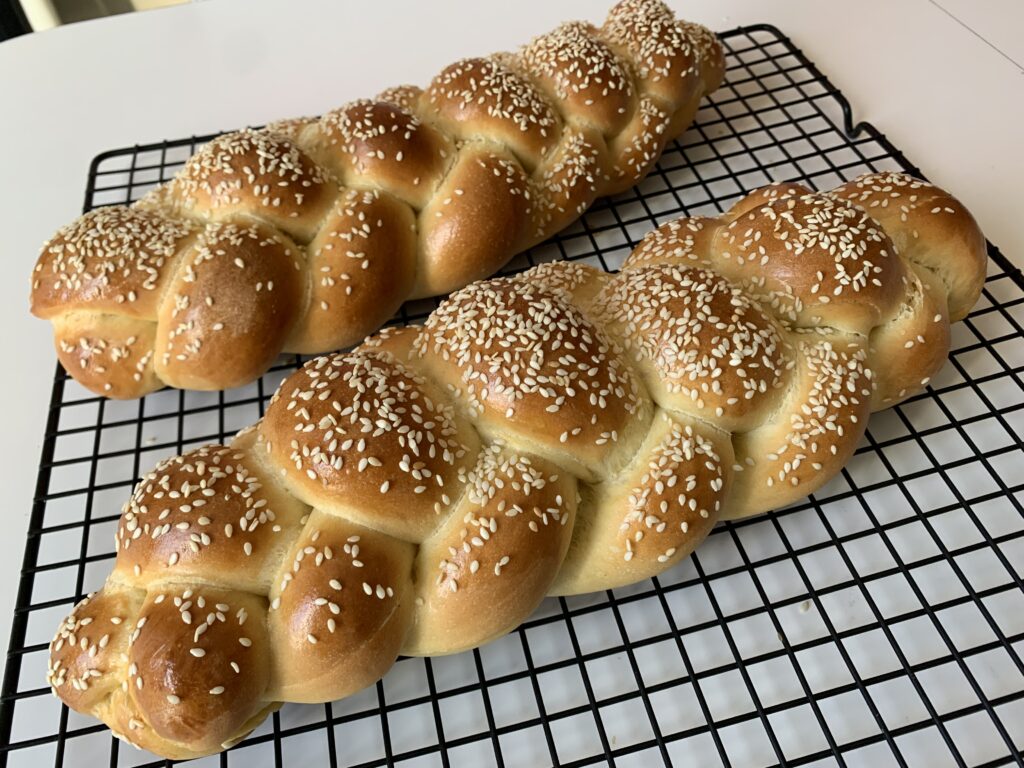
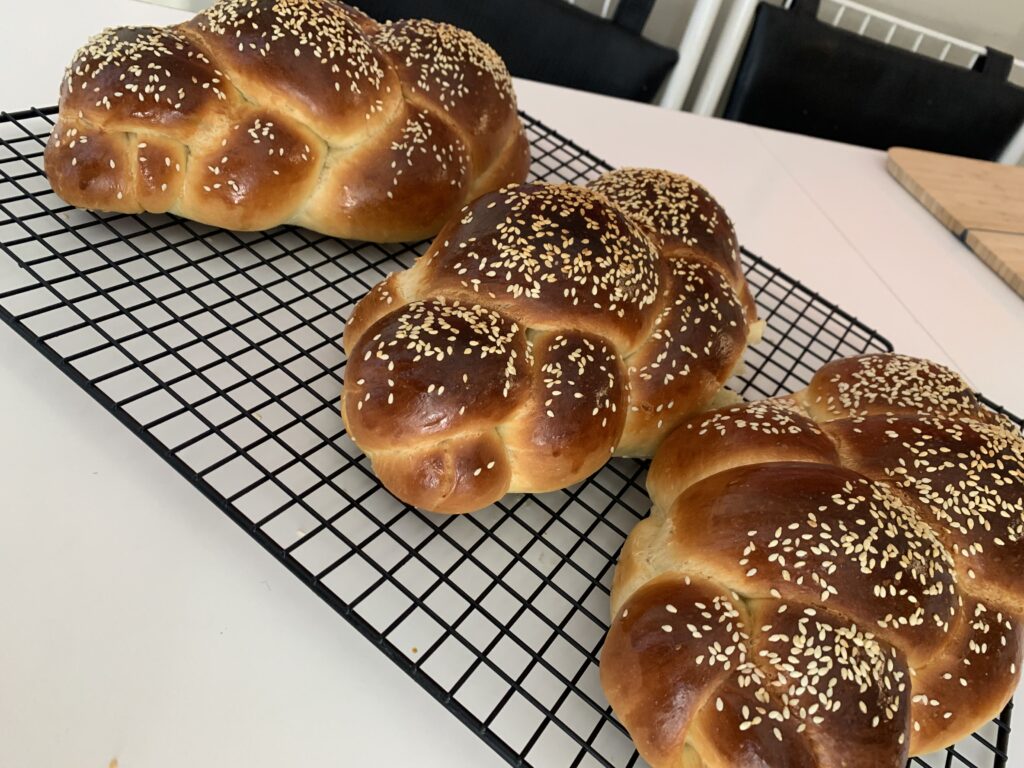
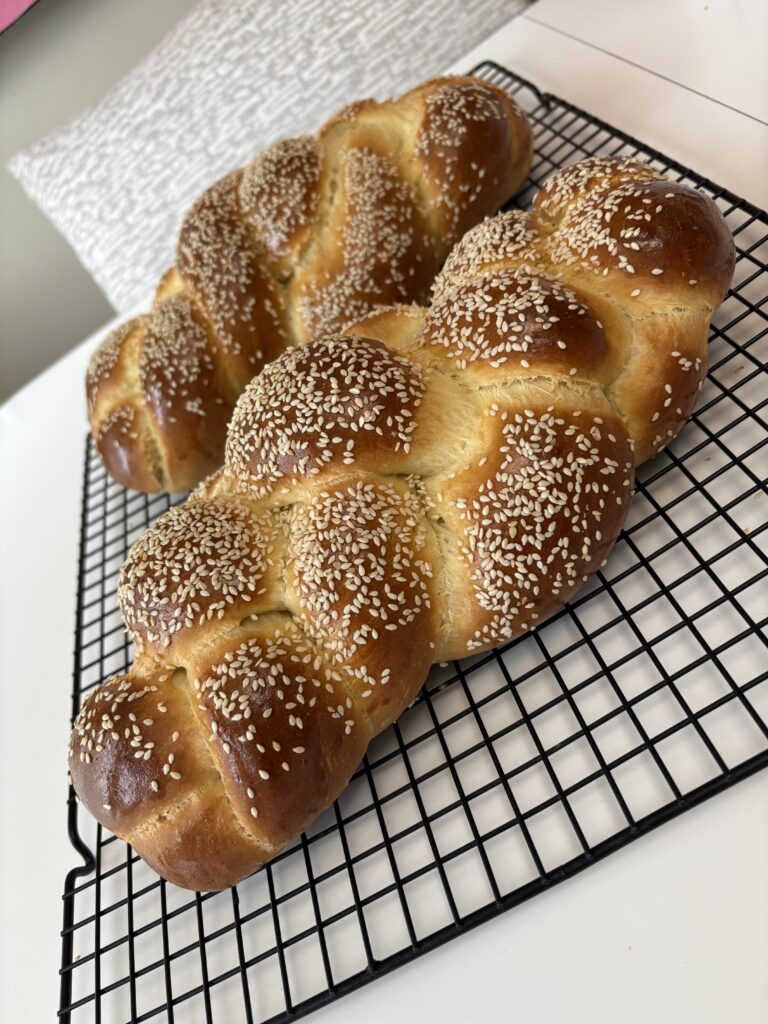
One of the nicest things about this cookbook is the chapter on braiding and shaping. In it, you’ll find pages and pages of detailed illustrations and directions. I’ve chosen to stick to four-strand braided challahs on this website, so I can compare the breads across recipes, but this cookbook offers two different four-strand versions. One is what they call a high strand, the other is low. I couldn’t decide which one to do…so I did both.
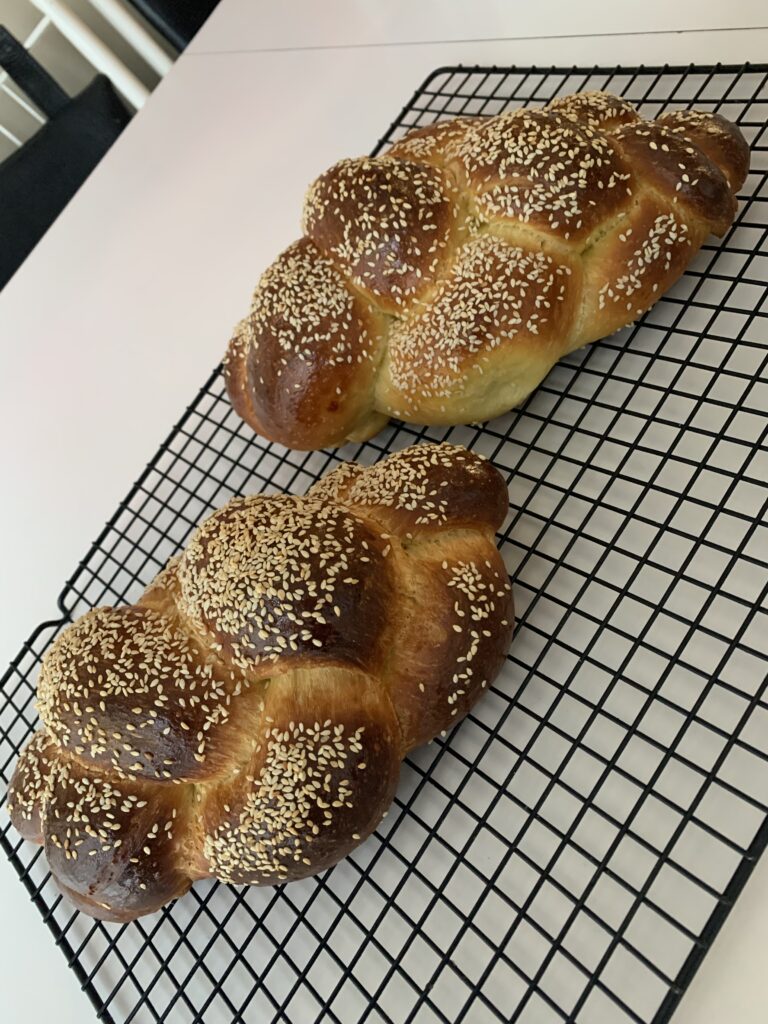
As you can see from the photos above, both versions came out high so I’m not sure what happened, but I’m here for it. Either way, whichever version you choose, they will come out gorgeous.
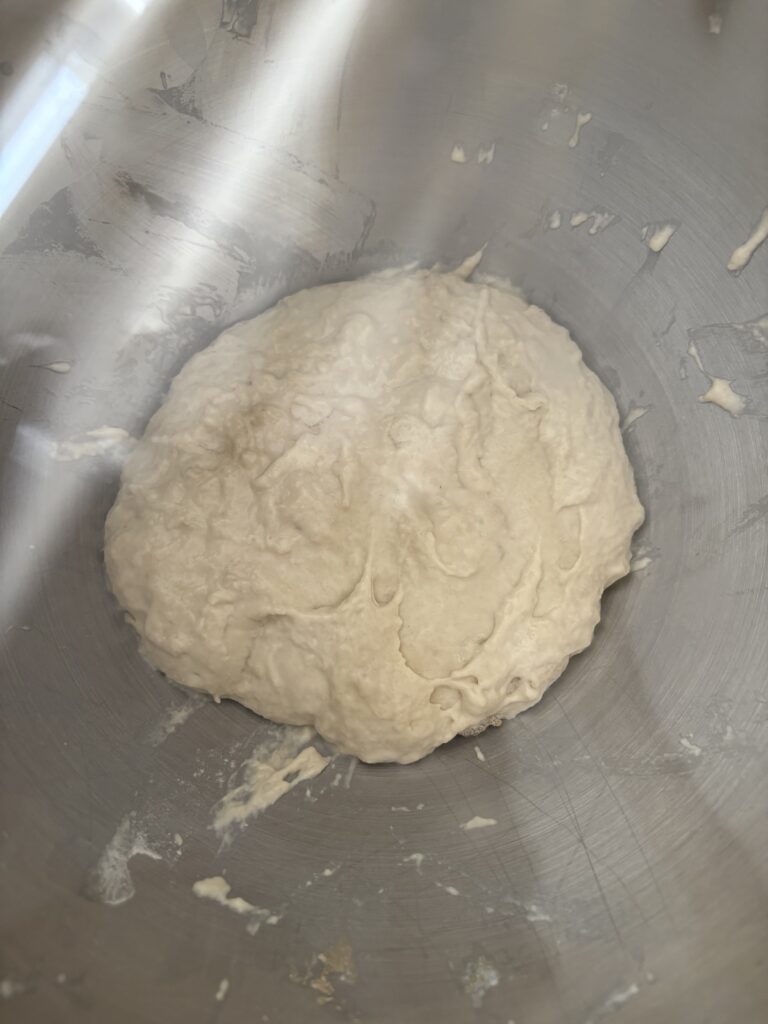
Strengths: This challah earns top marks for simplicity, even though it includes the extra step of making a sponge preferment. Once the sponge is bubbly, the next steps are straightforward: mix eggs with oil, add egg mixture, mix until smooth, add remaining ingredients, set aside to bulk ferment.
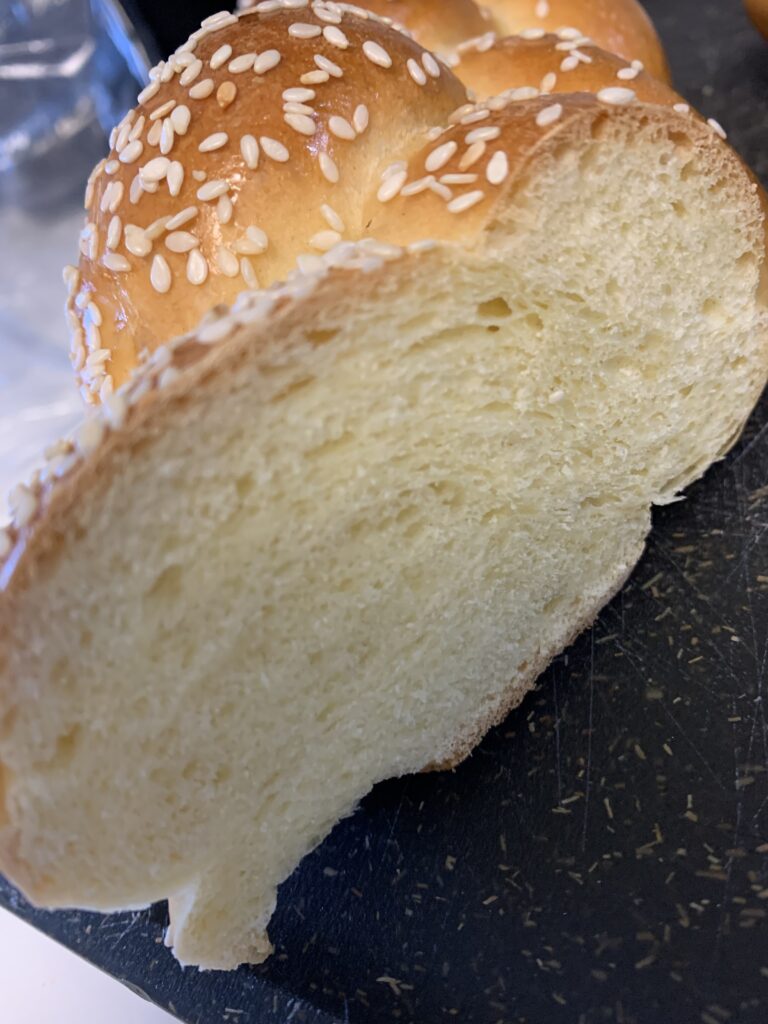
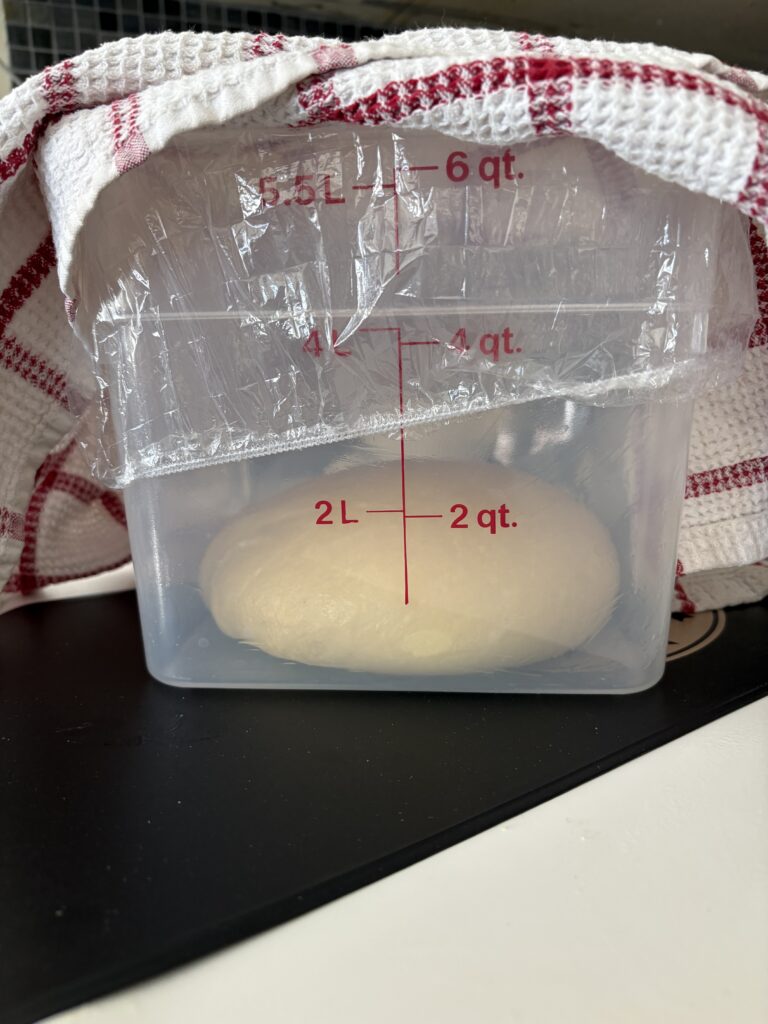
The final dough had a lovely Play-dough-type texture, albeit a tad more sticky. Rolling out the strands and braiding was easy, too.
Challenges: Even though directions for this bread are straightforward, the actual steps require a certain finesse. That’s because you are expected to mix the dough sufficiently over a shorter than average period of time. This can be difficult considering the high percentage of yeast, sugar, and fat. Add to that a short bulk fermentation time, and you catch my drift.
Doughs made with a lot of fat and sugar are hard to mix properly, because these ingredients are heavy. The added weight makes it difficult to properly blend it evenly with the lighter ingredients. This unevenness can lead to a poorly mixed dough, which results in a dense bread.
Additionally, this is an extremely rich dough at 15% fat. One of the richest enriched doughs is a brioche, which usually starts at 20%. When fat and sugar are high in a dough, proper mixing, fermentation, and baking can be tricky. But, man, if you can do it– wow–you won’t regret it! The bread will melt in your mouth.
The Science
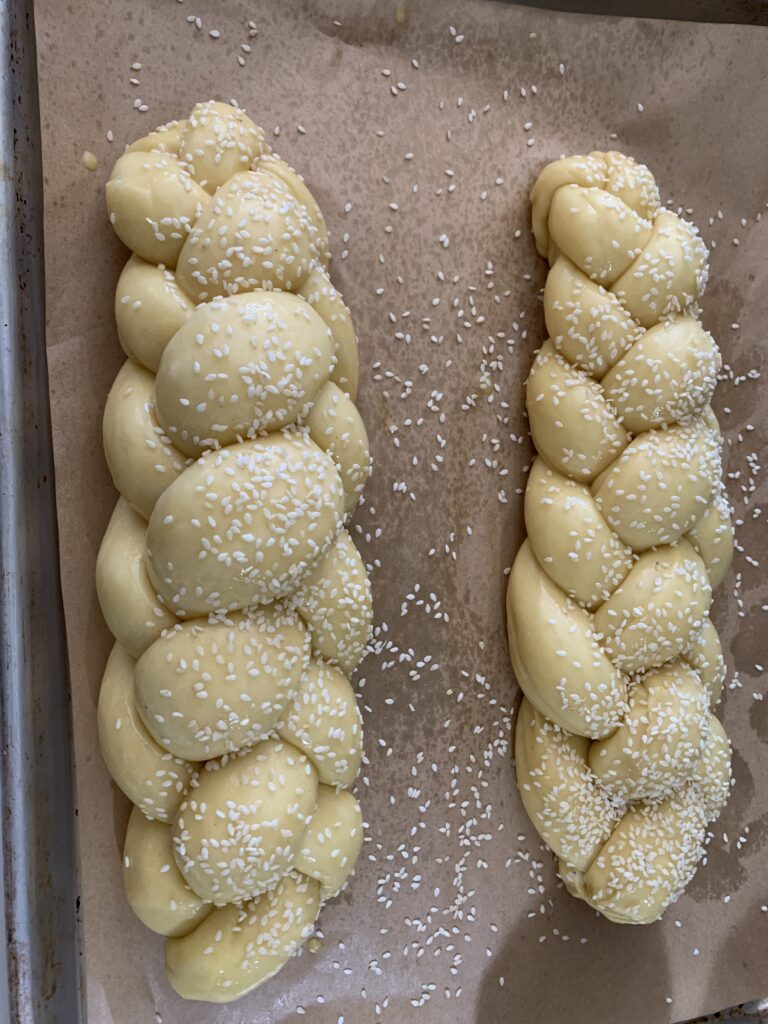
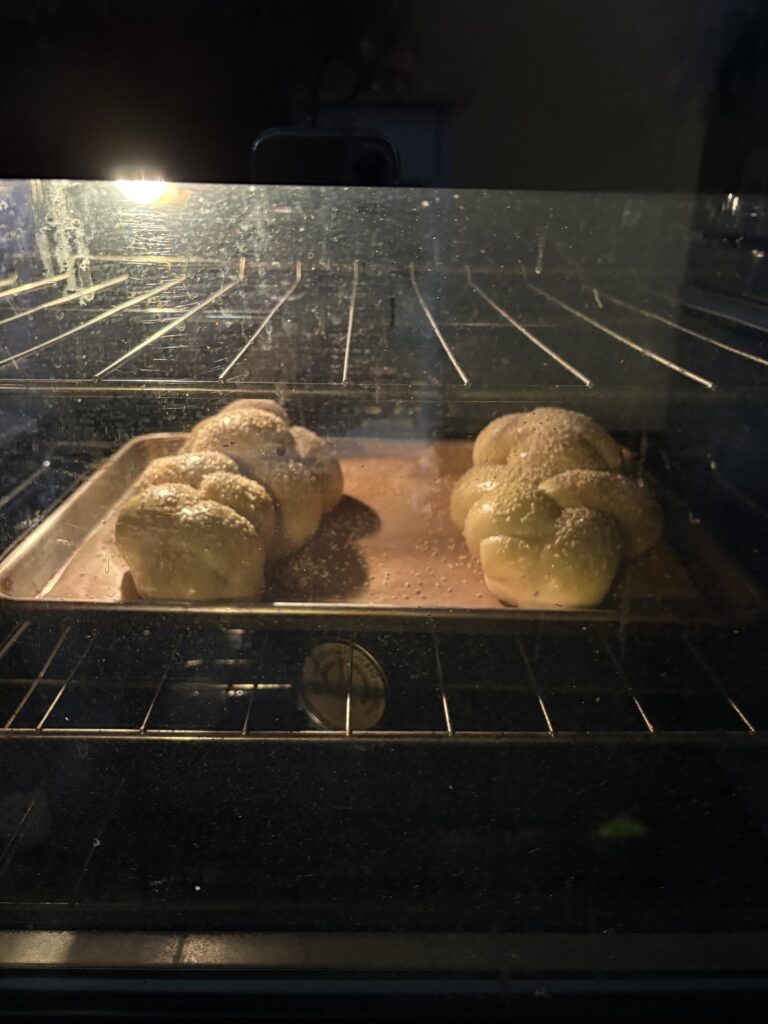
As you can see from the photos above, the braids pulled apart quite a bit during baking. This may be one of the biggest challenges challah bakers face. Why do our carefully crafted braids split, and how can we stop that from happening?
Well, the answer to that is…it depends.
Braids split when dough is under-kneaded, over-kneaded, has a weak gluten structure, has too much sugar, was shaped improperly, was under-proofed, over-proofed, or simply placed into a super hot oven…or a combination of some or all of these.
When trying to figure out the cause, I find it helpful to go through a process of elimination. After going through the list for this bake , I’m thinking their were four contributing factors.
First, this dough has a lot of sugar, and too much sugar can inhibit yeast development. Now, this doesn’t mean the bread won’t rise at all, it just means everything else has to go right for it to happen, and clearly that wasn’t the case here.
Another issue may be the short kneading window. As I mentioned earlier, sugar, eggs and oil are heavy ingredients. They have to be mixed thoroughly to build strong gluten strands. Add to that the short fermentation window, which also helps to strengthen gluten, and, on top of that, that the fermentation took place in a cool room…well, you get it.
Breads with sugar and commercial yeast kick start gas production. It’s the gases encased in gluten that gives your loaf lift. When the mixing time is short, you run the risk of the gluten strands not fully developing in time to trap the gases.
Add to that, the placement of the dough in a super hot oven, causing a natural burst of yeast energy, also known as oven-spring, and the whole thing may have been more than the weak gluten strands could handle.
The next time I make this bread, I will make several changes.
First, I will reduce the amount of sugar, primarily because it was too sweet for my liking, but also because all that sugar slows or, at very high levels, crushes yeast activity. A better option for those who like it sweet is to add honey, date syrup or sugar to the egg wash. If you go this route, keep a close eye on it in the oven, because it can burn easily. If the crust gets too dark, cover it loosely with foil or place a sheet pan on the rack above it.
Next, and most importantly, I will cold ferment the dough in the fridge overnight. That might give the gluten a chance to catch up.
Adapted Recipe
Yield: Two medium, 4-strand braided loaves.
Mix Method: Improved mix; with a short-acting sponge preferment.
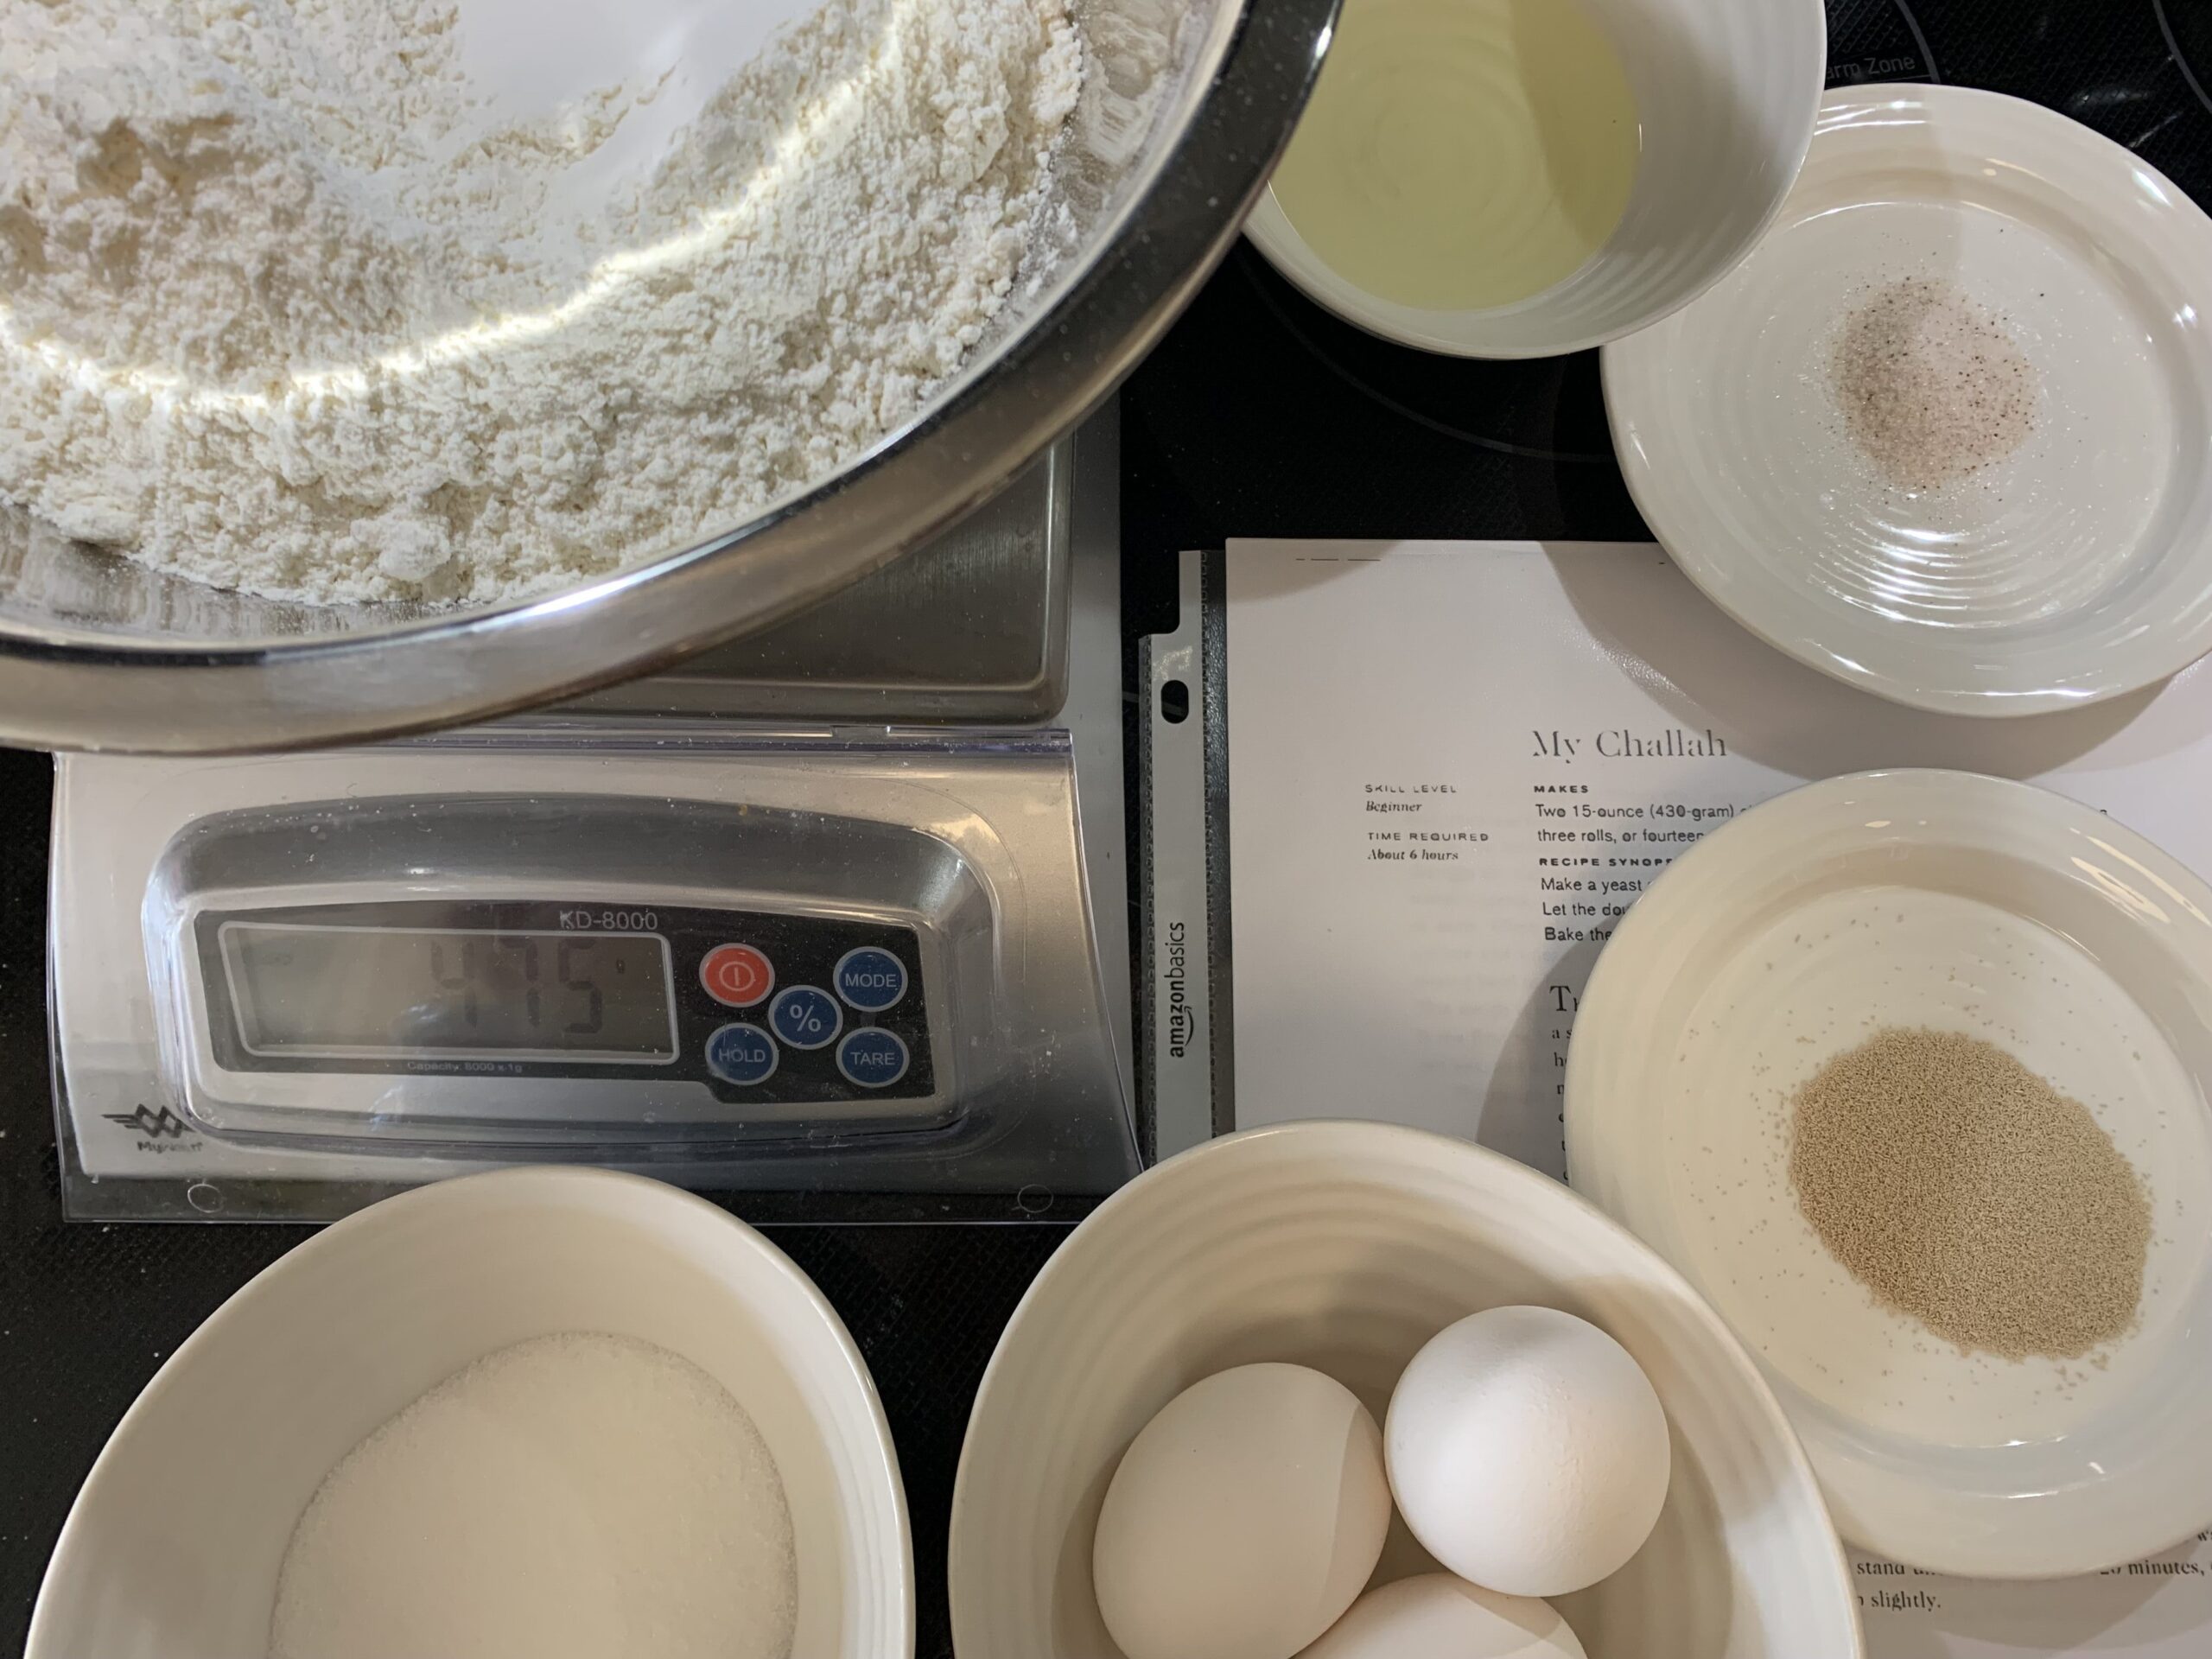
| Weight | Ingredient | Baker’s % |
| 790 g (5.3/4 c) | Bread flour (split: 225 g + 565 g) | 100% |
| 225 g (1 c) | Water | 29% |
| 14 g (3.1/2 tsp) | Instant yeast | 2% |
| 150 g (3 large) | Eggs | 19% |
| 18 g (1 large) | Egg yolk | 2% |
| 155 g (3/4 c) | Sugar, granulated | 19.6% |
| 14 g (2.1/4 tsp) | Salt, fine table | 2% |
| 100 g (1/2 c) | Oil, vegetable | 13% |
Directions:
- With the paddle attachment, mix 225 grams of flour with all of the yeast and water in the recipe. Cover with plastic wrap and leave in a warm place for 30-45 minutes, or until the mixture becomes puffy and filled with bubbles (the sponge).
- Whisk the eggs and oil in a separate bowl. Add to the sponge and mix using the paddle attachment until smooth.
- With the mixer running on low, gradually add the remaining dry ingredients (565 g flour, sugar and salt). Once the flour is hydrated (no dry bits left at the bottom), switch the attachment to the dough hook and mix on KA2 or a moderately low speed for 6-8 minutes until the dough is smooth and glossy.
- Turn dough out onto your bench, round up to create a smooth outer surface and place in a greased bowl to ferment for 60-90 minutes or until it doubles in size.
- Separate the ball into 8 pieces, roll up into a ball or thick strand. Cover and allow the gluten to relax, 20-30 minutes.
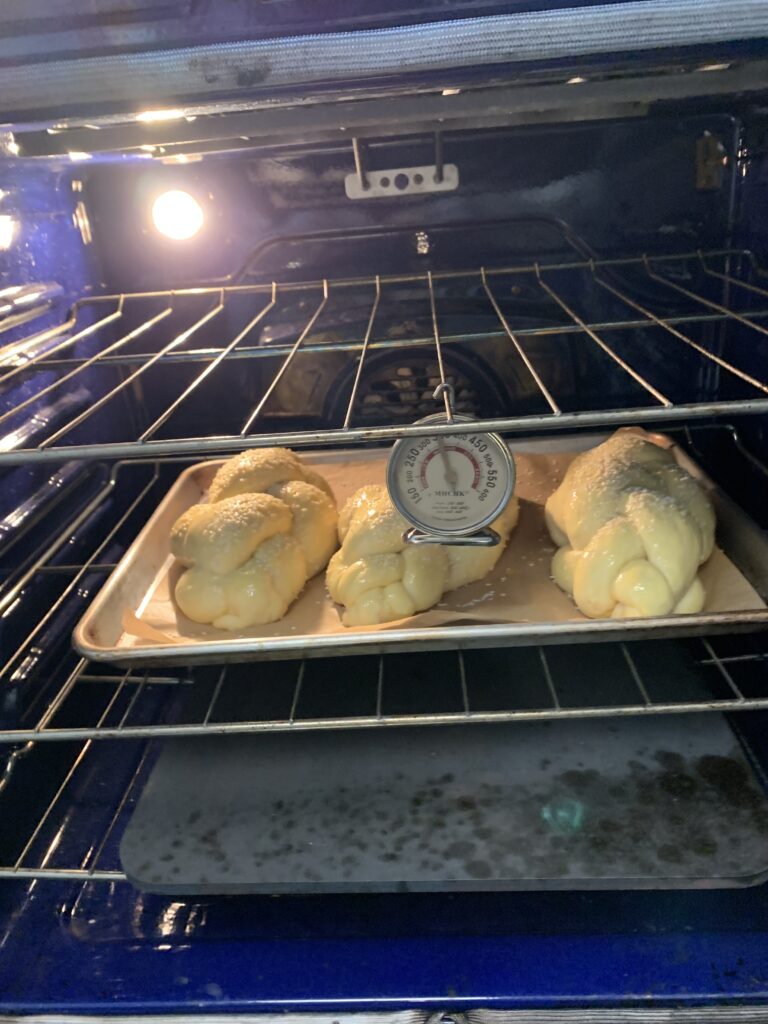
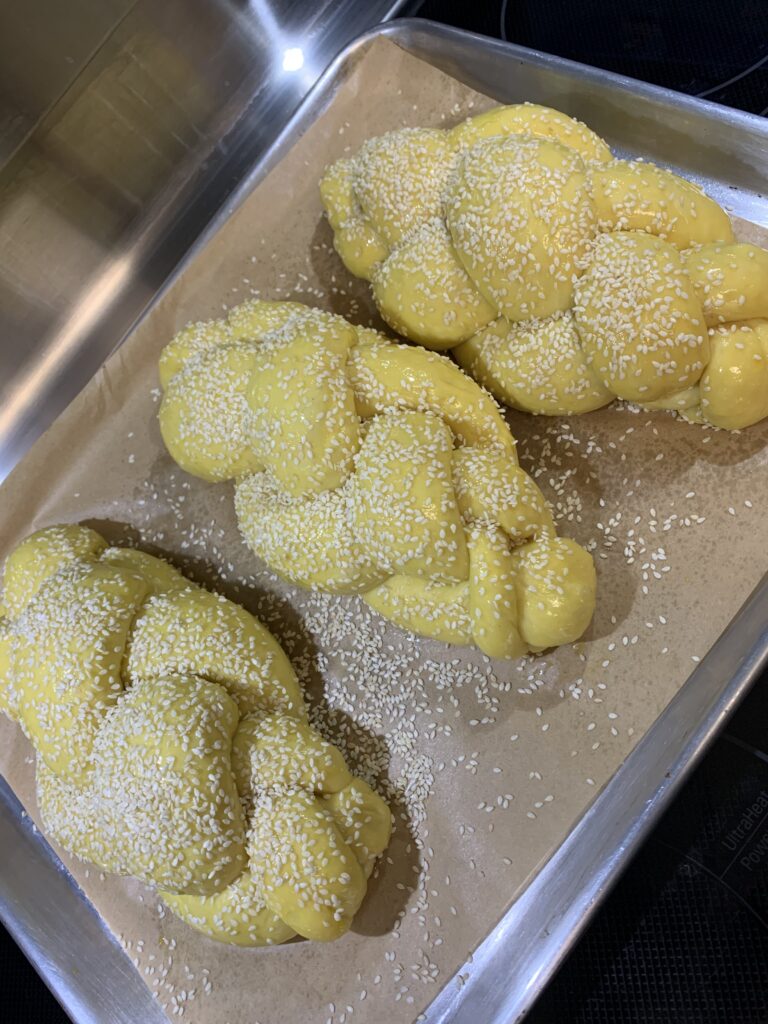
- Shape the braids, cover with plastic and allow to triple in size or rest until a finger poked into the loaf remains indented.
- Brush with egg wash, sprinkle with poppy or sesame seeds, and bake at 350 degrees F for 30-40 minutes, turning the loaves after 20 minutes. If the loaves are browning too quickly, tent them with foil. When they reach an internal temperature of 190°F, minimum, remove them from the oven and place on a wire rack to cool.
While Inside the Jewish Bakery is no longer in print, I encourage you to scour used book stores and your local library for a copy. It’s a fascinating walk down memory lane. If you can’t find a copy, the Sweet & Rich Challah recipe is available online.
Scoring
Ease: 7/10
Taste: 7/10
Texture: 8/10
Appearance: 8/10
Overall: 7.5/10